
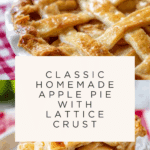
The BEST Double Crust Apple Pie Recipe
Introduction
This classic apple pie features a flaky double crust and a perfectly spiced, buttery apple filling. It’s a timeless dessert that fills your kitchen with warm, inviting aromas and impresses every time you serve it.
Ingredients
- 1 recipe for double pie crust
- 2 1/4 lbs Granny Smith apples, peeled and cored (about 6-7 apples or 7 cups thinly sliced)
- 1 1/2 tsp cinnamon
- 8 Tbsp unsalted butter
- 3 Tbsp all-purpose flour
- 1/4 cup water
- 1 cup granulated sugar
- 1 egg + 1 Tbsp water (for egg wash)
Instructions
- Step 1: Prepare your double pie crust recipe and chill it as directed while you make the filling. Preheat the oven to 425˚F (220˚C).
- Step 2: In a medium saucepan over medium heat, melt the butter. Whisk in the flour and simmer for about 1 minute, whisking constantly to avoid lumps.
- Step 3: Gradually whisk in the water and sugar, then bring the mixture to a boil. Reduce the heat and simmer for 3 minutes, stirring frequently. Remove from heat and set aside.
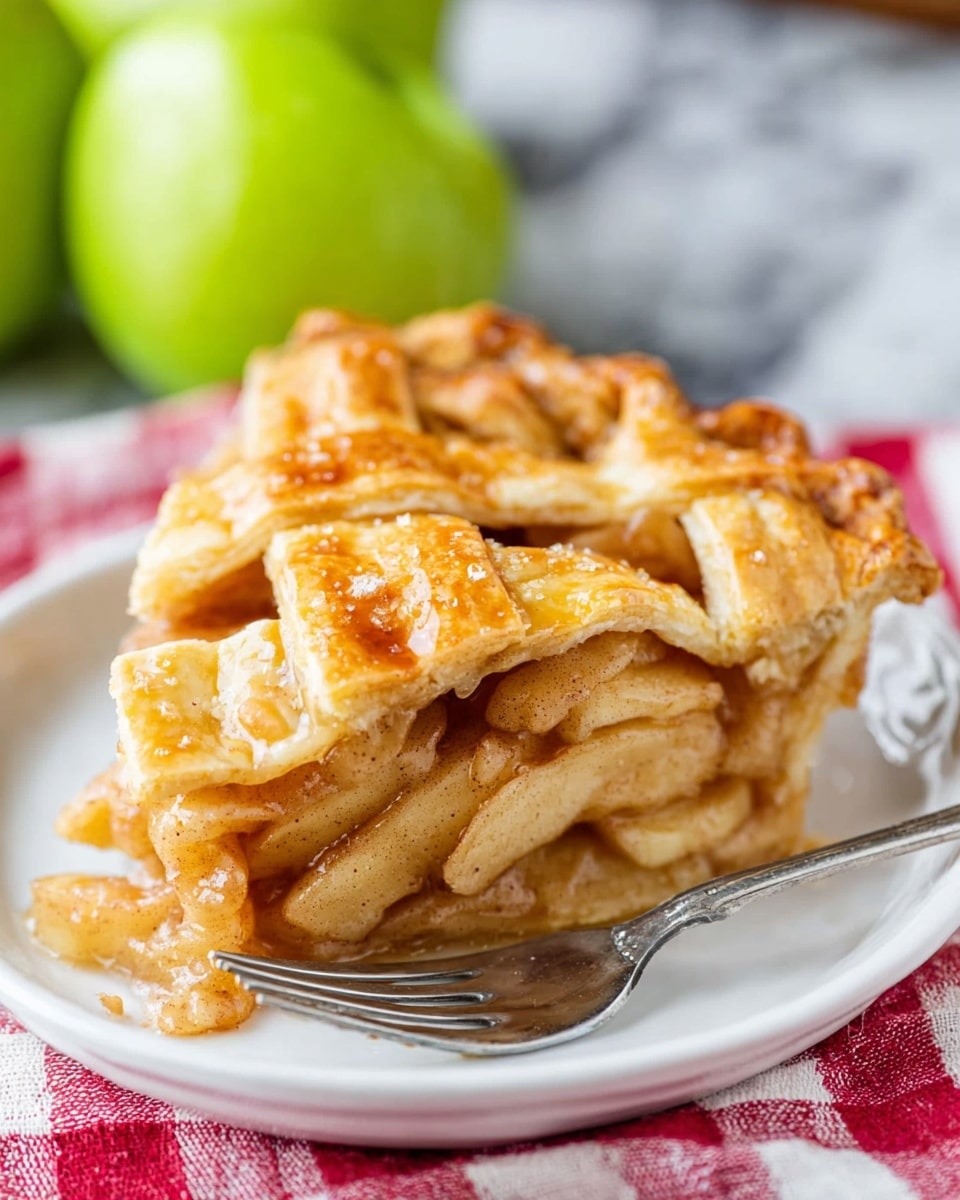
- Step 4: Peel, core, and slice the apples thinly. Place them in a large bowl, sprinkle with cinnamon, and toss to coat evenly. Pour the warm sauce over the apples and stir gently to combine.
- Step 5: On a floured surface, roll out the bottom pie crust to a 12-inch diameter circle. Carefully transfer it to a 9-inch pie plate, avoiding stretching.
- Step 6: Fill the crust with the apple mixture, mounding slightly in the center. Keep the filling away from the edges of the crust to ensure a good seal.
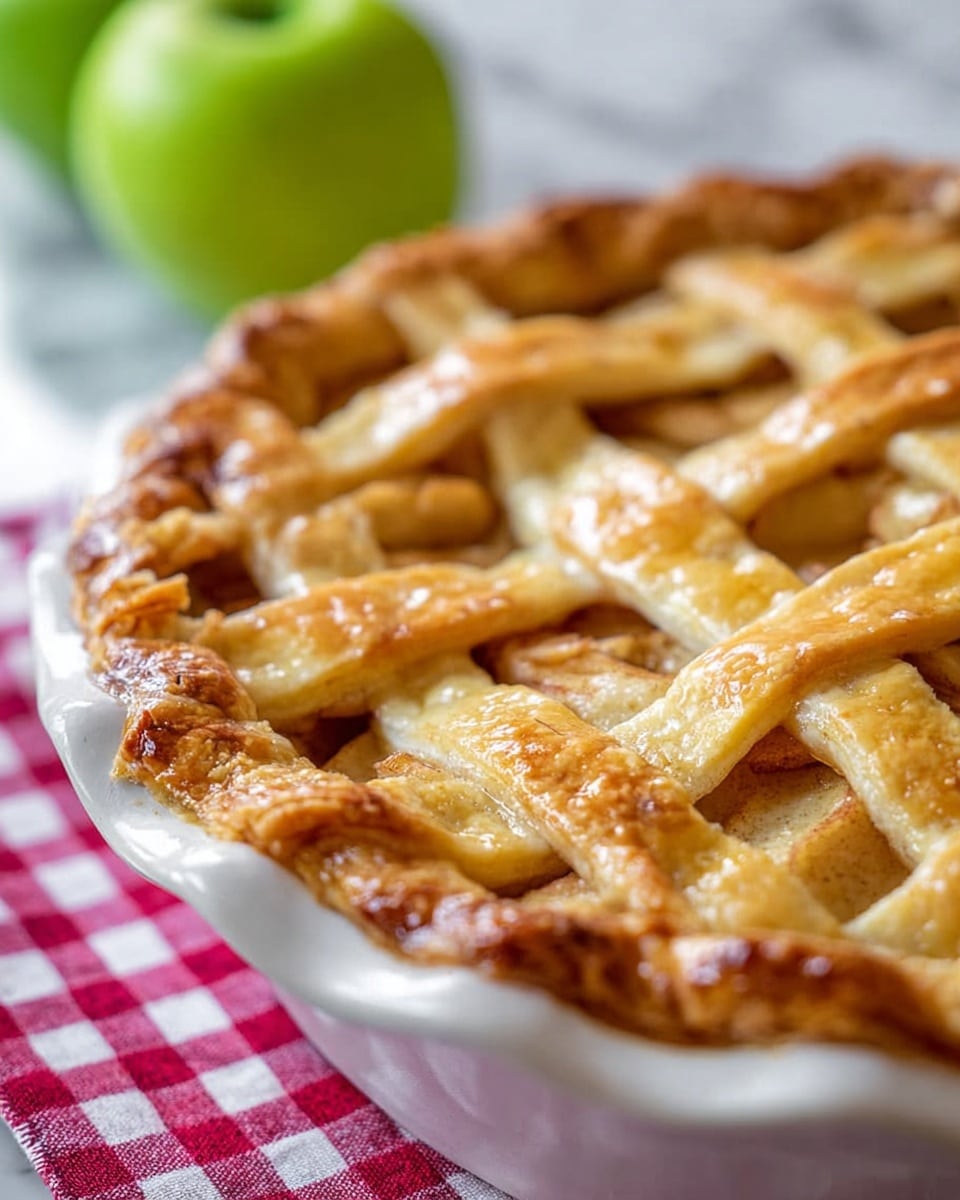
- Step 7: Roll out the second crust to an 11-inch round and cut into 10 even strips using a pizza cutter. Arrange the strips in a woven lattice pattern over the filling.
- Step 8: Beat the egg with 1 tablespoon of water to create an egg wash. Brush it lightly over the lattice crust to promote a golden finish.
- Step 9: Bake the pie in the center of the oven at 425˚F for 15 minutes. Then reduce the heat to 350˚F (175˚C) and bake for an additional 45 minutes, or until the apples are tender and the filling is bubbling through the lattice vents for at least 5 minutes.
- Step 10: Remove the pie from the oven and let it rest at room temperature for 1 hour before serving to allow the filling to set.
Tips & Variations
- Use Granny Smith apples for a tart, firm filling that holds shape well during baking.
- For extra richness, sprinkle a little cinnamon sugar on top of the egg wash before baking.
- Try adding a pinch of nutmeg or a splash of vanilla extract to the filling for added warmth and depth of flavor.
- If you prefer a simpler top, use a full second crust with slits instead of a lattice.
Storage
Store leftover apple pie loosely covered at room temperature for up to 2 days or in the refrigerator for up to 4 days. Reheat slices in a warm oven or microwave until warmed through for best texture and flavor.
How to Serve
Serve this delicious recipe with your favorite sides.
FAQs
Can I use other types of apples in this pie?
Yes, you can substitute with other firm, tart apples like Honeycrisp or Braeburn. Mixing varieties can also add complexity to the flavor.
How do I prevent the crust edges from burning?
Cover the pie edges with aluminum foil or a pie crust shield after the first 15-20 minutes of baking to protect them from over-browning.
PrintThe BEST Double Crust Apple Pie Recipe

This classic apple pie recipe features a tender, flaky double crust filled with a perfectly spiced, buttery apple filling made from tart Granny Smith apples. The lattice top crust adds a beautiful homemade touch, and this pie is baked to golden perfection with a luscious, bubbling filling that’s sure to impress at any gathering.
- Prep Time: 30 mins
- Cook Time: 1 hour
- Total Time: 1 hour 30 mins
- Yield: 8 servings 1x
- Category: Dessert
- Method: Baking
- Cuisine: American
Ingredients
Pie Crust
- 1 recipe for double pie crust (enough for top and bottom)
Filling
- 2 1/4 lbs Granny Smith apples (approximately 6–7 apples or 7 cups thinly sliced), peeled and cored
- 1 1/2 tsp cinnamon
- 8 Tbsp unsalted butter
- 3 Tbsp all-purpose flour
- 1/4 cup water
- 1 cup granulated sugar
Egg Wash
- 1 egg
- 1 Tbsp water
Instructions
- Prepare Pie Crust: Make the double pie crust recipe as instructed and chill it while preparing the filling to ensure a flaky and tender crust.
- Make the Sauce: In a medium saucepan, melt 8 tablespoons of unsalted butter over medium heat. Whisk in 3 tablespoons of all-purpose flour and simmer for 1 minute, whisking constantly to form a roux. Gradually add 1/4 cup water and 1 cup granulated sugar, then bring mixture to a boil. Reduce heat and simmer for 3 minutes, whisking frequently until thickened. Remove from heat.
- Prepare Apples: Peel, core, and thinly slice about 7 cups of Granny Smith apples. Place the slices in a large bowl and sprinkle with 1 1/2 teaspoons cinnamon. Toss gently to coat evenly. Pour the prepared butter-sugar sauce over the apples and stir carefully to combine, ensuring every slice is coated.
- Assemble Bottom Crust: Lightly flour your work surface and roll out the bottom pie crust to a 12-inch diameter circle. Carefully wrap the crust around your rolling pin to transfer it into a 9-inch pie plate. Arrange the apple mixture inside, mounding slightly in the center, taking care to keep the filling away from the edges to allow for easy sealing.
- Create Lattice Top: Roll out the second crust into an 11-inch round. Using a pizza cutter, cut it into 10 strips of even thickness. Weave the strips in a lattice pattern over the top of the apples for an attractive finish. Refer to a video tutorial for detailed weaving technique.
- Apply Egg Wash: Beat 1 whole egg with 1 tablespoon water to create an egg wash. Brush this mixture evenly over the lattice crust to give it a beautiful golden sheen when baked.
- Bake the Pie: Place the pie in the center rack of a preheated oven at 425°F (220°C) and bake for 15 minutes. Then reduce the oven temperature to 350°F (175°C) and continue baking for an additional 45 minutes, or until the apples are tender and the filling is bubbling visibly through the vents for at least 5 minutes.
- Cool Before Serving: Remove the pie from the oven and allow it to rest at room temperature for 1 hour. This resting time helps the filling to set properly, making it easier to slice and enjoy.
Notes
- Using Granny Smith apples provides a tart flavor that balances the sweetness of the filling.
- The double pie crust recipe is essential for both a sturdy bottom and a decorative top.
- The lattice crust allows steam to escape and adds a visually appealing finish.
- Resting time after baking improves the texture and prevents filling from being too runny when sliced.
- You can substitute some of the granulated sugar with brown sugar for a richer flavor if desired.
- Ensure the filling does not touch the edges of the crust to avoid sealing issues.
Keywords: apple pie, classic apple pie, lattice crust pie, homemade pie, fall dessert, Granny Smith apples, spiced apple pie

