
Pinata Cake Recipe
Introduction
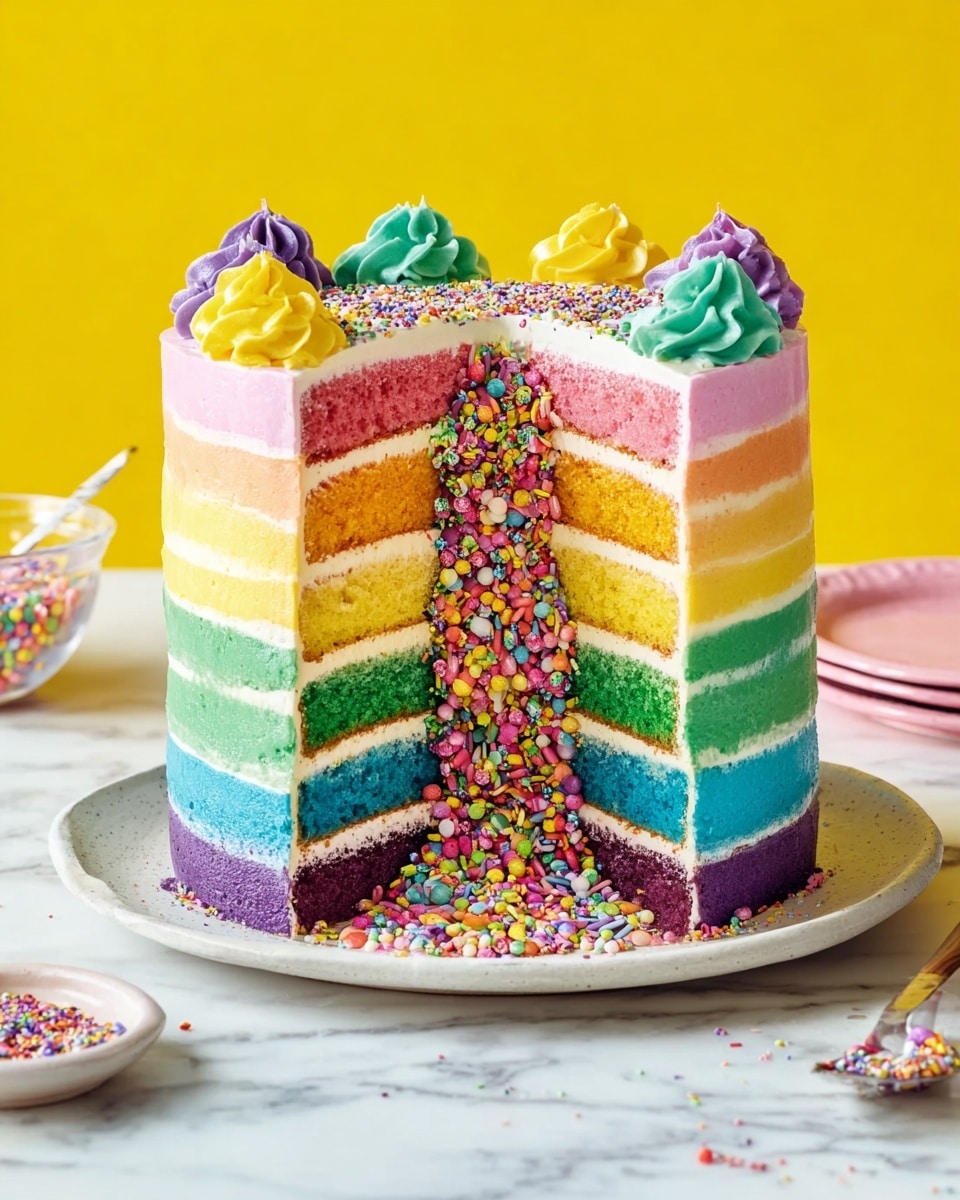
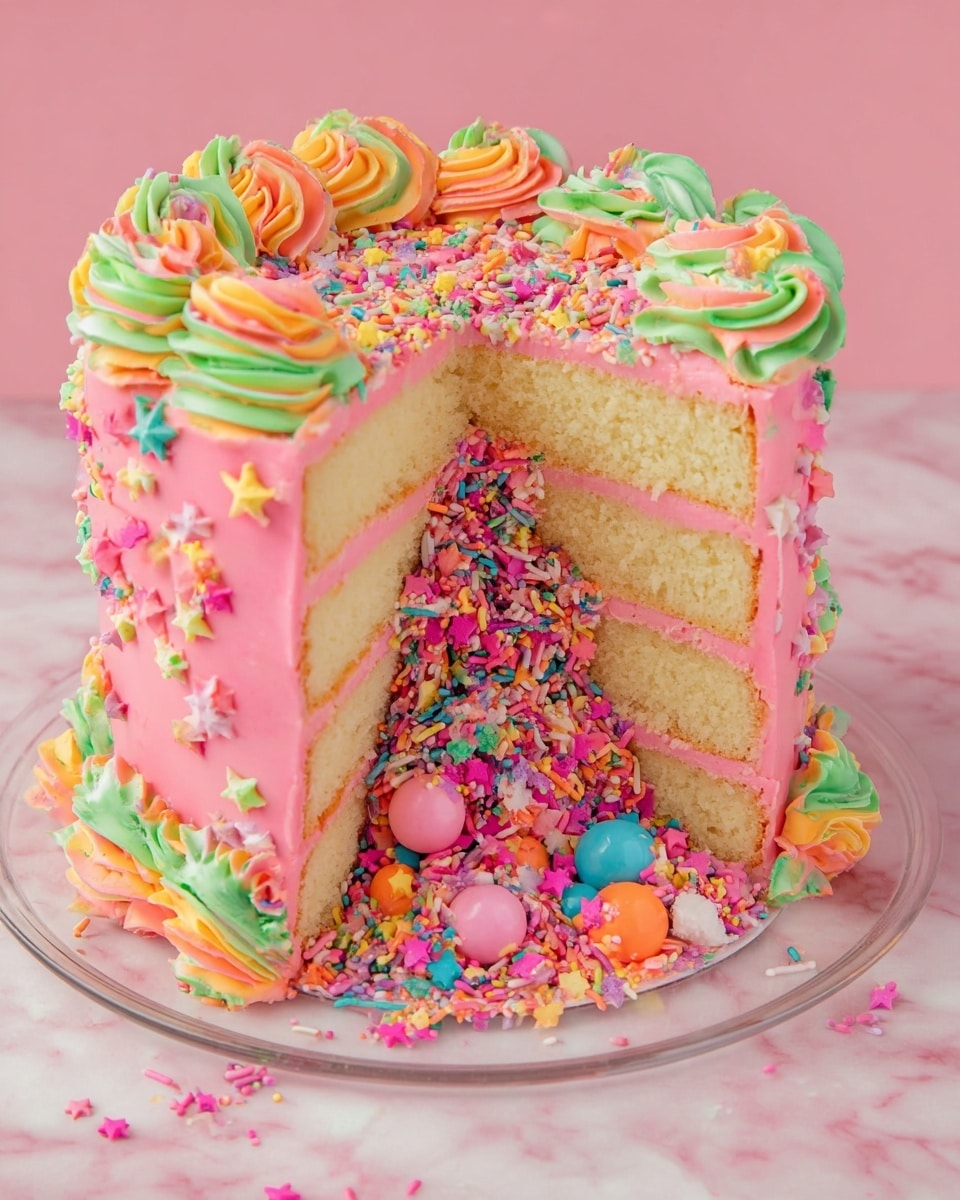
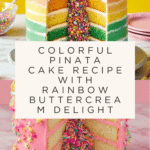
This vibrant piñata cake is a delightful surprise for any celebration. Bursting with colorful layers and a hidden sprinkle center, it’s as fun to make as it is to eat. Perfect for brightening up birthdays and special occasions alike.
Ingredients
- 330 g Margarine
- 330 g Caster Sugar
- 6 Medium Eggs (beaten)
- 15 ml Dr. Oetker Madagascan Vanilla Extract (1 tbsp)
- 330 g Self-Raising Flour
- Dr. Oetker Pink Food Colour Gel (1/2 tsp)
- Dr. Oetker Yellow Food Colour Gel (1/2 tsp)
- Dr. Oetker Green Food Colour Gel (1/2 tsp)
- Dr. Oetker Blue Food Colour Gel (1/2 tsp)
- Dr. Oetker Violet Food Colour Gel (1/2 tsp)
- 500 g Unsalted Butter
- 1000 g Icing Sugar
- 30 ml Dr. Oetker Madagascan Vanilla Extract (2 tbsp)
- 60 ml Whole Milk (4 tbsp)
- Dr. Oetker Pink Food Colour Gel (1 1/2 tsp)
- Dr. Oetker Yellow Food Colour Gel (1 1/2 tsp)
- Dr. Oetker Green Food Colour Gel (1 1/2 tsp)
- Dr. Oetker Blue Food Colour Gel (1 1/2 tsp)
- Dr. Oetker Violet Food Colour Gel (1 1/2 tsp)
- 1.5 jars Dr. Oetker Unicorn Confetti Sprinkles (2 jars)
Instructions
- Step 1: Preheat your oven to 180°C (160°C fan)/Gas Mark 4. Grease and line five 7” cake tins. If you have fewer tins, bake the sponges in batches.
- Step 2: Cream together the margarine and caster sugar using a mixer until light and fluffy.
- Step 3: Add the beaten eggs and Madagascan vanilla extract, mixing until smooth. If the mixture curdles, add a spoonful of flour to help.
- Step 4: Sieve the self-raising flour over the mixture and fold it in until fully combined.
- Step 5: Divide the batter evenly into five bowls. Add a different food colour gel to each bowl (pink, yellow, green, blue, violet) and mix thoroughly.
- Step 6: Pour each coloured batter into the prepared tins and bake for 20–25 minutes, or until risen and a skewer comes out clean. Cool in the tins for 10 minutes, then transfer to a wire rack to cool completely.
- Step 7: To make the buttercream, beat the unsalted butter until smooth and glossy. Gradually add the icing sugar in four additions, mixing well after each.
- Step 8: Add the milk a tablespoon at a time and whisk until light and fluffy. Adjust the milk quantity to achieve a spreadable consistency.
- Step 9: Divide the buttercream into six bowls; leave one bowl white and colour the other five with the same food colour gels used for the sponge but create pastel shades for a softer look.
- Step 10: Level each sponge layer using a sharp knife to remove any domed tops.
- Step 11: Using an 8cm round cutter, cut a hole in the centre of the blue, green, and yellow sponge layers to form the piñata section.
- Step 12: Place a small dab of buttercream on your cake board or serving plate. Set the purple sponge layer on top.
- Step 13: Spread a spoonful of white buttercream evenly over the purple sponge.
- Step 14: Stack the blue, green, and yellow sponges in order, spreading white buttercream between each layer.
- Step 15: Fill the cavity in the centre of the stacked layers with the Unicorn Confetti Sprinkles, saving some for decoration.
- Step 16: Place the pink sponge on top, then crumb coat the whole cake with the remaining white buttercream. Chill the cake in the fridge for 30 minutes to set.
- Step 17: Remove the cake from the fridge. Using a palette knife, apply bands of coloured buttercream around the sides in layers—purple at the bottom, then blue, green, yellow, and pink at the top and edges.
- Step 18: Smooth the sides gently with a cake scraper to blend the colours without losing their definition.
- Step 19: Fill piping bags with the remaining coloured buttercream. Pipe swirls or buttercream kisses around the top edge of the cake using a star nozzle or a plain cut tip.
- Step 20: Finish by sprinkling the remaining Unicorn Confetti Sprinkles over the top. Your stunning piñata cake is ready to impress and enjoy!
Tips & Variations
- If you don’t have enough cake tins, bake the sponges one or two at a time and keep the cooled layers wrapped to retain moisture.
- Try substituting the margarine for unsalted butter in the sponge for a richer flavour.
- Use pastel colours in the buttercream for a softer finish and bright colours in the sponge for a vivid surprise inside.
- To make the piñata filling extra fun, mix the confetti sprinkles with small candies or chocolate chips.
Storage
Store the assembled piñata cake in an airtight container in the refrigerator for up to 3 days. Before serving, allow the cake to come to room temperature for about 30 minutes to soften the buttercream. The cake can also be frozen, wrapped tightly in cling film and foil, for up to one month. Thaw overnight in the fridge before bringing to room temperature.
How to Serve
Serve this delicious recipe with your favorite sides.
FAQs
Can I make this cake without food colouring gels?
Yes, but the signature piñata effect depends on the vibrant colours. Without gels, the cake will be plain in appearance. Natural colourings like beetroot powder or turmeric can be alternatives but may alter the flavour slightly.
What if I don’t have enough cake tins for all layers?
You can bake the sponge layers in batches, cooling each layer completely before lining a tin and baking the next. Make sure to keep baked layers wrapped in cling film to maintain moisture while baking the others.
PrintPinata Cake Recipe

This vibrant Pinata Cake features layers of colorful sponge filled with a surprising cavity of confetti sprinkles. A soft, pastel-hued buttercream coats the exterior, creating a visually stunning and festive dessert that’s perfect for celebrations or special occasions. Each bite offers a delightful pop of color and sweetness, combining classic vanilla sponge with a playful hidden center.
- Prep Time: 60 minutes
- Cook Time: 30 minutes
- Total Time: 150 minutes
- Yield: 1 cake (serves approximately 12-16) 1x
- Category: Dessert
- Method: Baking
- Cuisine: Western
- Diet: Vegetarian
Ingredients
For the Sponge
- 330 g Margarine
- 330 g Caster Sugar
- 6 Medium Eggs (beaten)
- 15 ml Dr. Oetker Madagascan Vanilla Extract (1 tbsp)
- 330 g Self-Raising Flour
- 1/2 tsp Dr. Oetker Pink Food Colour Gel
- 1/2 tsp Dr. Oetker Yellow Food Colour Gel
- 1/2 tsp Dr. Oetker Green Food Colour Gel
- 1/2 tsp Dr. Oetker Blue Food Colour Gel
- 1/2 tsp Dr. Oetker Violet Food Colour Gel
For the Buttercream
- 500 g Unsalted Butter
- 1000 g Icing Sugar
- 30 ml Dr. Oetker Madagascan Vanilla Extract (2 tbsp)
- 60 ml Whole Milk (4 tbsp)
- 1 1/2 tsp Dr. Oetker Pink Food Colour Gel
- 1 1/2 tsp Dr. Oetker Yellow Food Colour Gel
- 1 1/2 tsp Dr. Oetker Green Food Colour Gel
- 1 1/2 tsp Dr. Oetker Blue Food Colour Gel
- 1 1/2 tsp Dr. Oetker Violet Food Colour Gel
To Decorate
- 1.5 jars Dr. Oetker Unicorn Confetti Sprinkles
Instructions
- Preheat and Prepare Tins: Preheat your oven to 180°C (160°C fan oven, Gas Mark 4). Grease and line five 7-inch cake tins. If you lack enough tins, plan to bake the sponges in batches to ensure even baking.
- Cream Margarine and Sugar: Using a freestanding or handheld mixer, cream together the margarine and caster sugar until light and fluffy to create the batter base.
- Add Eggs and Vanilla: Beat in the eggs and Madagascan Vanilla Extract until the mixture is smooth. If the mix curdles, add a spoonful of self-raising flour to correct the texture.
- Fold in Flour: Sieve the self-raising flour over the mixture and gently fold it in until fully combined, ensuring a light sponge batter.
- Color the Batter: Divide the batter evenly into five separate bowls. Add a different color of food gel (pink, yellow, green, blue, violet) to each bowl and mix well to achieve vibrant, even colors.
- Bake the Sponge Layers: Pour each colored batter into the prepared cake tins. Bake for 20-25 minutes or until risen and a skewer inserted in the center comes out clean. Cool in the tins for 10 minutes, then transfer to a wire rack to cool completely.
- Make the Buttercream: Beat the unsalted butter in a bowl until smooth and glossy. Gradually add the icing sugar in four stages, mixing well between additions. Add the whole milk one tablespoon at a time until the buttercream is light and fluffy.
- Color the Buttercream: Divide the buttercream into six bowls. Leave one bowl white and color the other five with the different food gels to create soft pastel shades matching the sponge layers.
- Level the Sponge Layers: Using a sharp knife, level each cake layer by trimming off any domed tops for an even stacking surface.
- Create the Pinata Holes: Using an 8cm round cutter, cut out the centers of the blue, green, and yellow sponge layers to form cavities for the sprinkle filling.
- Assemble the Base Layers: Place a small dollop of buttercream on the cake board or serving plate to secure the bottom purple sponge layer. Spread an even layer of white buttercream over this sponge with a palette knife.
- Stack Colored Layers with Buttercream: Place the blue sponge on top and spread buttercream evenly. Repeat by stacking the green and yellow sponges, each coated with buttercream.
- Fill the Pinata Cavity: Pour the Unicorn Confetti Sprinkles into the hollow centers of the stacked blue, green, and yellow layers to create the pinata surprise inside the cake.
- Top with Pink Sponge and Crumb Coat: Place the pink sponge layer on top of the filled layers and apply a thin crumb coat of white buttercream around the entire cake. Chill the cake in the fridge for 30 minutes to set.
- Apply Colored Buttercream Bands: Remove the cake from the fridge. Using a palette knife, apply bands of purple, blue, green, and yellow buttercream around the sides of the cake from bottom to near the top. Cover the top surface with pink buttercream, leaving some pink around the upper edge.
- Smooth the Buttercream: Use a cake scraper to gently smooth the sides, blending the buttercream colors so they softly merge while retaining defined rainbow bands.
- Pipe Buttercream Decorations: Fill piping bags with leftover colored buttercream, using star nozzles or trimmed bag ends to pipe swirls or kisses alternating colors around the top edge of the cake.
- Finish with Sprinkles: Scatter additional Unicorn Confetti Sprinkles over the piped buttercream decorations to complete your festive pinata cake ready to enjoy!
Notes
- You can bake sponges in batches if you don’t have enough tins, but ensure layers are completely cooled before assembling.
- To avoid mixing bright colors in the buttercream, use only enough color gel for pastel shades.
- If the batter curdles when adding eggs, adding a spoonful of flour helps to stabilize it.
- Allow the crumb coat to chill well to make decorating easier and cleaner.
- Use a sharp serrated knife for levelling the cakes to minimize crumbling.
- Adjust milk quantity to achieve desired buttercream consistency, adding slowly.
Keywords: pinata cake, colorful cake, rainbow cake, buttercream cake, celebration cake, festive dessert
