
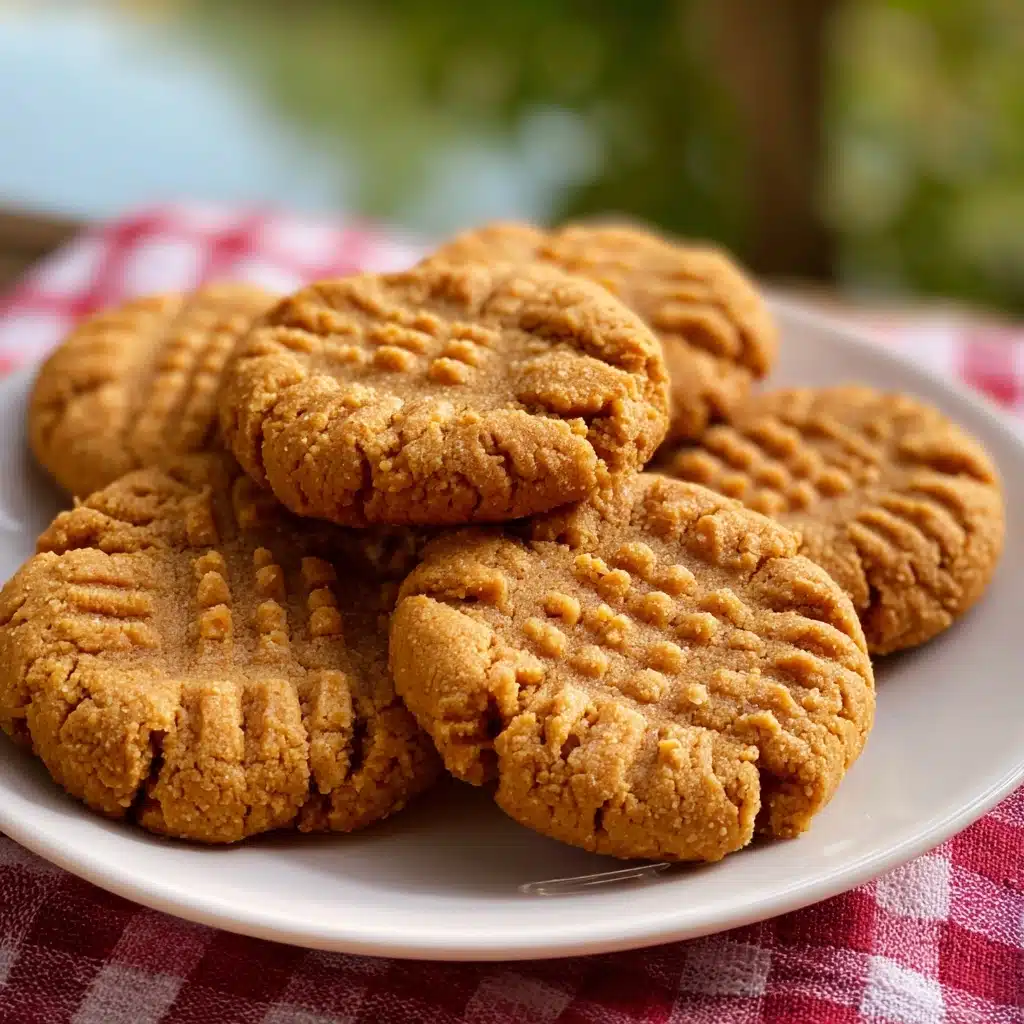
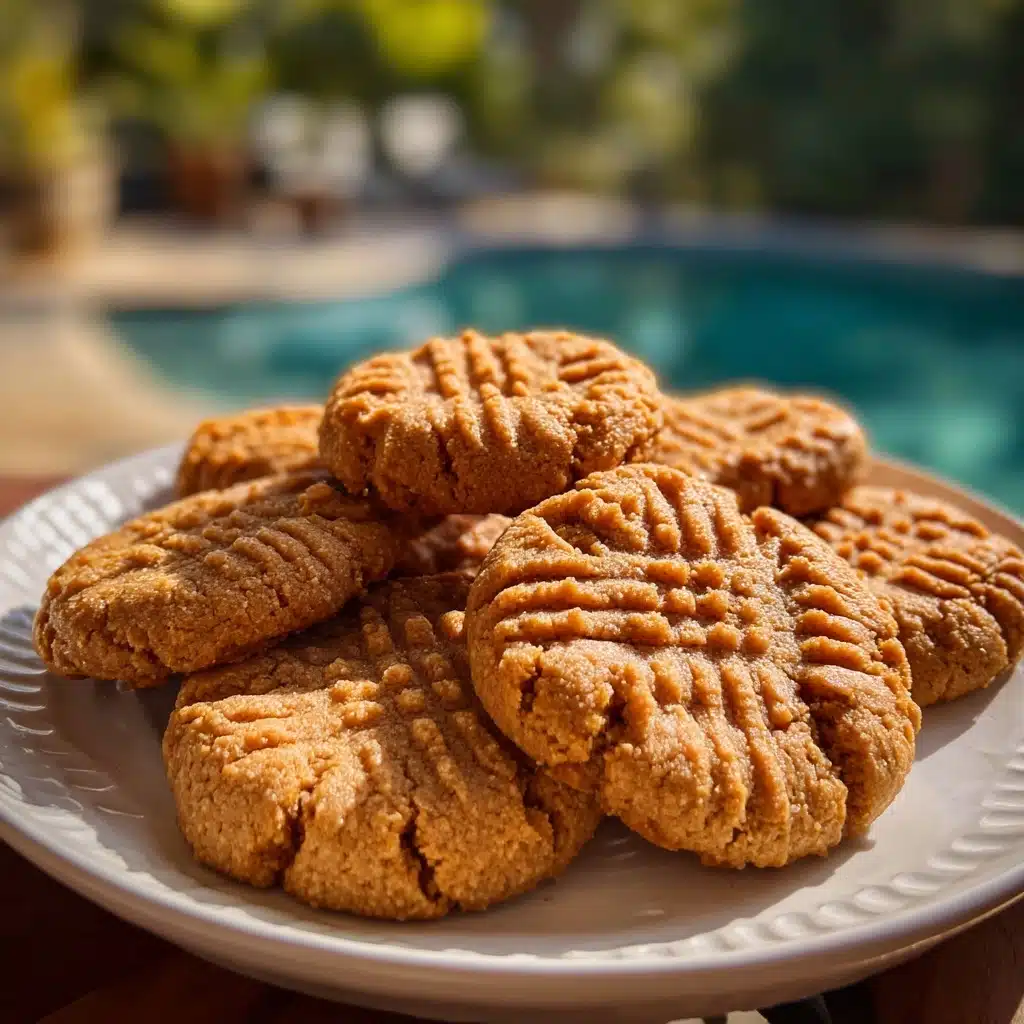
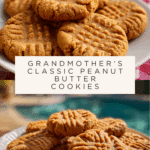
Jimmy Carter’s Grandmother’s Peanut Butter Cookies Recipe
If you’re ready to bake up a batch of warm, nostalgic comfort, look no further than Jimmy Carter’s Grandmother’s Peanut Butter Cookies. This charming recipe is a true taste of Southern tradition, brimming with rich peanut flavor, perfectly tender centers, and delightfully crisp edges. Every bite feels like a sweet hug from a loving grandmother, and each cookie shares a legacy—with just the right balance of salty and sweet, they’re irresistible for snackers young and old.
Ingredients You’ll Need
The beauty of Jimmy Carter’s Grandmother’s Peanut Butter Cookies lies in how a handful of simple pantry basics combine to create such memorable flavor. Each ingredient plays its own special role in building the ultimate peanut butter cookie—nothing fancy, just pure and honest deliciousness.
- Peanut Butter: Choose creamy for smooth cookies or chunky for bits of nutty surprise; the hero ingredient brings iconic flavor and chewiness.
- Unsalted Butter: Softened butter adds richness and that classic tender crumb.
- Granulated Sugar: For sweetness with just the right amount of spread in the oven.
- Brown Sugar: Packed in for a hint of molasses and extra moist, chewy centers.
- Large Egg: Acts as the binder, bringing everything together for a cohesive dough.
- Vanilla Extract: Rounds out the flavors with a soft, fragrant undertone.
- All-purpose Flour: The sturdy base that gives structure and shape.
- Baking Soda: Ensures the cookies rise with a delicate, crackled top.
- Baking Powder: Partners with baking soda for that perfect lift and tender texture.
- Salt: Enhances all the flavors and keeps the sweetness in check.
How to Make Jimmy Carter’s Grandmother’s Peanut Butter Cookies
Step 1: Prep Your Baking Sheet
Begin by preheating your oven to 350°F (175°C). While your oven heats, line a baking sheet with parchment paper to make sure the cookies bake evenly and slide right off with no sticking or crumbling. This little prep step keeps cleanup a breeze—let’s you focus on the fun part!
Step 2: Cream Butter, Peanut Butter, and Sugars
In a large mixing bowl, add the softened butter, peanut butter, granulated sugar, and brown sugar. With a mixer or sturdy wooden spoon, cream everything together until the mixture is light, fluffy, and slightly paler in color. This process not only blends your ingredients but sets up those irresistibly soft and chewy centers.
Step 3: Add Egg and Vanilla
Crack in the large egg, then pour in the vanilla extract. Mix until completely combined. This step enriches the dough and infuses every bite of Jimmy Carter’s Grandmother’s Peanut Butter Cookies with subtle vanilla warmth, all while ensuring your batter is as smooth as can be.
Step 4: Combine Dry Ingredients
In a separate bowl, whisk together the flour, baking soda, baking powder, and salt. Whisking prevents lumps and evenly distributes the leaveners for cookies that bake up just right.
Step 5: Create the Cookie Dough
Gradually add the dry mixture into your creamed wet ingredients, stirring gently until it’s all incorporated. You’ll notice the dough thickening and taking on that classic peanut butter cookie feel—malleable, rich, and ready to scoop.
Step 6: Roll and Shape
Take small portions of dough (about a tablespoon each) and roll them between your palms into balls. Arrange them on the prepared baking sheet, leaving a couple inches between each, since they’ll spread as they bake.
Step 7: The Crisscross Signature
Grab a fork, dip it in a bit of sugar if you like, and press gently down on each cookie ball to create that distinct crisscross pattern—a hallmark of Jimmy Carter’s Grandmother’s Peanut Butter Cookies. This not only looks classic but also helps the cookies bake evenly through the center.
Step 8: Bake to Golden Perfection
Slide the tray into your preheated oven and bake for 10–12 minutes. Watch for golden edges and slightly soft centers; the cookies will firm up as they cool. Don’t over-bake—the magic is in that perfect, melt-in-your-mouth tenderness.
Step 9: Cool and Enjoy
Let your cookies rest on the baking sheet for a few minutes before gently transferring them to a wire rack. This pause helps them set and makes them easier to move. Once cool enough to handle, dive in and savor the comforting flavors of home.
How to Serve Jimmy Carter’s Grandmother’s Peanut Butter Cookies
Garnishes
While these cookies are perfect just as they are, you can easily dress them up with a dusting of powdered sugar, a quick drizzle of melted chocolate, or even a few chopped roasted peanuts sprinkled over the crisscross tops. Each little garnish adds personality and an extra-special touch for sharing.
Side Dishes
Jimmy Carter’s Grandmother’s Peanut Butter Cookies pair beautifully with a fresh glass of milk (classic!), a steaming cup of coffee, or a scoop of vanilla ice cream. They’re right at home on a dessert platter with brownies and lemon bars, making them perfect for holiday trays and after-dinner treats alike.
Creative Ways to Present
Turn a simple batch into something memorable by stacking the cookies in a glass jar and wrapping with a ribbon for a handmade gift. Or tuck a few into lunchboxes, picnic baskets, or as a sweet surprise in someone’s mailbox. For parties, serve them mini-sized with a chocolate chip sandwiched in the middle!
Make Ahead and Storage
Storing Leftovers
To keep Jimmy Carter’s Grandmother’s Peanut Butter Cookies at their freshest, store them in an airtight container at room temperature. They’ll stay soft and craveable for up to five days, though good luck making them last that long!
Freezing
Want cookies on demand? Freeze baked cookies in a zipper bag or airtight container, layering parchment between stacks. You can also freeze unbaked dough balls—just form, crisscross, and freeze. When you’re ready to bake, pop them straight in the oven, adding an extra minute or two to the baking time.
Reheating
If your cookies need a little refresh, place them on a baking sheet and warm in a 300°F oven for three to five minutes. Alternatively, a quick 10-second zap in the microwave revives that just-baked softness, making them taste like they’re fresh from the oven every time.
FAQs
Can I use natural peanut butter for this recipe?
You can! Just keep in mind that natural peanut butter is looser and may result in cookies that spread more. Stir your nut butter well to redistribute the oils, and consider chilling the dough before baking for the best texture.
What’s the secret to getting the crisscross pattern just right?
Dip your fork in a little sugar between presses to prevent sticking and keep your lines sharp. Press gently; you want to flatten the dough evenly without squashing it too thin.
Can I double the recipe?
Absolutely. Jimmy Carter’s Grandmother’s Peanut Butter Cookies are a crowd-pleaser, and this recipe scales beautifully. Just make sure not to overcrowd your bowl or baking sheets—work in batches if needed.
What should I do if my cookies turn out dry?
Dry cookies usually mean overbaking or too much flour. Be sure to measure your flour using the spoon-and-level method and keep a close eye during the final baking minutes—the centers should look a little soft when you pull them from the oven.
Can I add chocolate chips or mix-ins?
Yes, you can jazz them up with chocolate chips, toffee bits, or chopped peanuts for extra texture. Stir in a cup or so after you mix in the dry ingredients for a fun twist on the classic Jimmy Carter’s Grandmother’s Peanut Butter Cookies.
Final Thoughts
Whether you’re new to baking or hold countless childhood memories of peanut butter cookies, Jimmy Carter’s Grandmother’s Peanut Butter Cookies are an absolute must-try. Their warm, homemade flavor wraps you in a blanket of tradition and sweetness each and every time. Give them a go—you’ll see why they’re a family favorite through generations!
PrintJimmy Carter’s Grandmother’s Peanut Butter Cookies Recipe

These classic peanut butter cookies, inspired by a recipe from Jimmy Carter’s grandmother, are a delightful treat for any occasion. With a perfect balance of sweet and nutty flavors, these cookies are sure to become a household favorite.
- Prep Time: 15 minutes
- Cook Time: 10-12 minutes
- Total Time: 25-27 minutes
- Yield: Makes about 24 cookies 1x
- Category: Dessert
- Method: Baking
- Cuisine: American
- Diet: Vegetarian
Ingredients
Wet Ingredients:
- 1 cup peanut butter (creamy or chunky)
- 1/2 cup unsalted butter, softened
- 1/2 cup granulated sugar
- 1/2 cup brown sugar, packed
- 1 large egg
- 1 teaspoon vanilla extract
Dry Ingredients:
- 1 1/2 cups all-purpose flour
- 1 teaspoon baking soda
- 1/2 teaspoon baking powder
- 1/4 teaspoon salt
Instructions
- Preheat oven: Preheat oven to 350°F (175°C) and line a baking sheet with parchment paper.
- Cream ingredients: In a large bowl, cream together butter, peanut butter, granulated sugar, and brown sugar until light and fluffy.
- Add egg and vanilla: Add the egg and vanilla extract, mixing until well combined.
- Combine dry ingredients: In a separate bowl, whisk together flour, baking soda, baking powder, and salt. Gradually add to the wet mixture, stirring until a soft dough forms.
- Form dough balls: Roll dough into small balls and place on the baking sheet. Use a fork to gently press a crisscross pattern on each cookie.
- Bake: Bake for 10-12 minutes, or until edges are lightly golden.
- Cool and serve: Let cookies cool on the baking sheet for a few minutes before transferring them to a wire rack. Serve and enjoy!
Nutrition
- Serving Size: 1 cookie
- Calories: 150
- Sugar: 9g
- Sodium: 120mg
- Fat: 10g
- Saturated Fat: 3g
- Unsaturated Fat: 6g
- Trans Fat: 0g
- Carbohydrates: 14g
- Fiber: 1g
- Protein: 3g
- Cholesterol: 15mg
Keywords: Peanut Butter Cookies, Jimmy Carter, Dessert, Baking, Homemade