
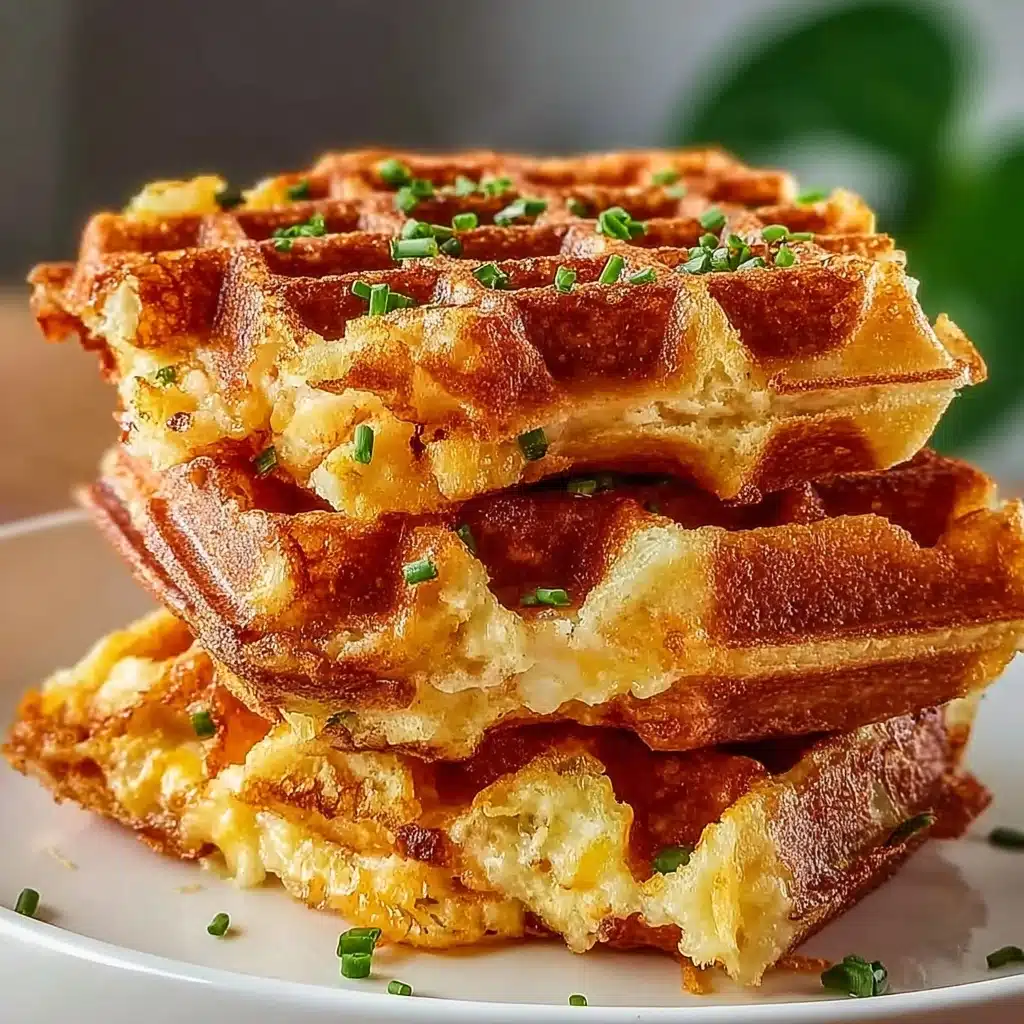
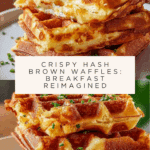
Crispy Hash Brown Waffles Recipe
If you’re a fan of golden, crunchy hash browns and the utter joy of breakfast waffles, let me introduce you to your new morning obsession: Crispy Hash Brown Waffles. This dish is a magical marriage of comfort and crispiness — freshly shredded potatoes and a hint of onion get pressed in a waffle maker until lacy and golden, then ready to be loaded with your favorite toppings or enjoyed on their own. Whether you’re looking to kickstart the day or impress brunch guests, Crispy Hash Brown Waffles always deliver a deeply satisfying crunch and cozy flavor in every bite.

Ingredients You’ll Need
Making Crispy Hash Brown Waffles is proof that you don’t need a long ingredient list to create something irresistible. Each trusty staple plays a starring role, working together for that perfect flavor, texture, and crisp outer layer.
- Russet Potatoes (2 large): Their high starch, low moisture content ensures maximum crispiness and a hearty potato flavor.
- Yellow Onion (1/4 medium): Finely grated for subtle aromatic sweetness and savory depth that boosts every bite.
- All-Purpose Flour (2 tablespoons): The binding secret! Helps hold the mixture together without making waffles too dense.
- Egg (1 large): Binds, enriches, and adds just the right amount of fluff to the potato mixture.
- Salt (1 teaspoon): Essential for brightening the potatoes and seasonings — don’t skimp!
- Black Pepper (1/2 teaspoon): Gives a gentle kick and complexity; fresh cracking makes a difference.
- Garlic Powder (1/2 teaspoon): For that savory, garlicky edge without the harshness of raw garlic.
- Vegetable Oil (for cooking): Ensures the waffles release easily and get gorgeously crispy on the outside.
- Optional Seasonings (to taste): Feel free to jazz things up with paprika, cayenne, thyme, or rosemary.
How to Make Crispy Hash Brown Waffles
Step 1: Prepare the Potatoes
Start by giving your russet potatoes a good scrub and peeling them. Once peeled, use a box grater or the grating attachment on your food processor to shred them. Aim for medium-sized shreds for ideal texture — too fine and your waffles will be soft, too chunky and they might not hold together as well. Medium shreds strike the perfect balance, cooking up evenly while maintaining that signature potato bite.
Step 2: Remove Excess Moisture
This step is key to achieving the legendary crispiness that defines Crispy Hash Brown Waffles. Place your shredded potatoes in a clean kitchen towel or cheesecloth, gather up the ends, and squeeze like your breakfast depends on it — because it does! You’ll be amazed at the amount of water that comes out. If your potatoes still seem damp, don’t hesitate to squeeze a second time with a fresh towel. Dryer potatoes mean crunchier waffles, guaranteed.
Step 3: Grate the Onion
Peel your onion and finely grate 1/4 of it, using the same grater or food processor. The goal here is to ensure the onion cooks through and melts into the potato mixture, bringing in a whisper of savory sweetness without overpowering the potatoes. If you’re nervous about your eyes watering, try chilling the onion in the fridge first.
Step 4: Combine Ingredients
In a large mixing bowl, combine the squeezed potatoes, grated onion, all-purpose flour, egg, salt, black pepper, and garlic powder. Use your hands or a spatula to mix until everything is coated and combined. Make sure there are no floury pockets and that the mixture looks like one happy, cohesive mass. For extra flavor, this is the perfect moment to stir in any optional seasonings you love.
Step 5: Preheat Waffle Iron
It’s time for the magic! Preheat your waffle iron according to its instructions until good and hot — most have a ready light or a temperature indicator. While it heats, brush both grids (top and bottom) with vegetable oil or lightly mist with nonstick spray. This ensures your Crispy Hash Brown Waffles release easily and brown evenly. A hot, well-oiled iron means you’ll get that signature crust every single time.
Step 6: Cook the Waffles
Scoop about 1/2 cup of the potato mixture onto the center of your waffle iron (the exact amount will depend on the size of your iron). Gently spread it out toward the edges, but avoid overfilling to prevent overflow. Close the lid and let the potatoes transform under pressure.
Step 7: Waffle Iron Magic
Let your waffle iron do its thing, usually 5-7 minutes, until the waffles are a rich golden brown and intensely crispy. The scent of browning potatoes will let you know you’re on the right track. Avoid opening the iron too early or you may tear the waffles — patience is rewarded here! The longer cook time allows the outer layer to become perfectly crunchy while the inside remains tender.
Step 8: Achieve Peak Crispiness
Use a fork or tongs to gently lift your Crispy Hash Brown Waffles out and place them on a wire rack. This little trick keeps them ultra crispy by letting the steam escape, rather than trapping it (which can make them soggy if placed directly on a plate). If you’re cooking multiple waffles, you can keep them warm in a low oven.
Step 9: Repeat and Serve
Continue the process with the rest of the potato mixture, greasing the waffle iron lightly between batches if necessary. Serve your hash brown waffles piping hot, crispy, and ready for their crown of toppings. Trust me, the savoriness and crunch fresh from the iron are unmatched!
How to Serve Crispy Hash Brown Waffles
Garnishes
Dress up your Crispy Hash Brown Waffles with classic or creative toppings. Think dollops of sour cream, chopped fresh chives, or a sprinkle of sharp cheddar. You can keep it simple or pile on extras like crispy bacon, hot sauce, or even a fried egg for that irresistible brunchy vibe.
Side Dishes
These waffles are a showstopper on their own, but they also shine next to a stack of scrambled eggs, fresh fruit, or a light green salad for contrast. For a heartier spread, consider serving with smoked salmon, sautéed mushrooms, or avocado slices — there’s really no wrong way to enjoy these!
Creative Ways to Present
Take Crispy Hash Brown Waffles beyond breakfast by cutting them into strips for dunking into aioli or ketchup, or use them as a base for smoked salmon and crème fraîche as an hors d’oeuvre. You can even sandwich sausage and cheese between two waffles for an unforgettable breakfast sandwich. Your creativity (and appetite) are the only limits!
Make Ahead and Storage
Storing Leftovers
If you end up with leftover Crispy Hash Brown Waffles, let them cool completely before wrapping in foil or placing in an airtight container. Store in the refrigerator for up to three days, and try to avoid stacking them directly so they maintain their crispy texture as much as possible.
Freezing
Crispy Hash Brown Waffles freeze strikingly well. Lay fully cooled waffles in a single layer on a baking sheet and freeze until firm. Once frozen, transfer them to a zip-top freezer bag and store for up to two months. This method makes it easy to grab a single serving whenever the craving strikes.
Reheating
To re-crisp your waffles and bring back that just-cooked magic, pop them directly from the fridge or freezer into a toaster or oven (about 375°F for 5-10 minutes). Skip the microwave if you can, as it tends to soften the golden crust rather than restore the crunch.
FAQs
Can I use a different type of potato?
Russet potatoes are preferred for their high starch content and ultra-crispy result, but in a pinch, Yukon Golds work too — just expect slightly less crunch and a creamier texture.
Do I have to peel the potatoes?
Peeling is recommended for the smoothest, most uniform hash brown waffles, but you can leave the skin on if you love a rustic vibe and extra fiber. Just be sure to scrub them well.
What if I don’t own a waffle iron?
You can still achieve something similar by shaping small patties from the mixture and cooking them in a well-oiled skillet, pressing them flat and flipping until both sides are crisp and golden!
Can I add cheese to the mixture?
Absolutely! Fold in a small handful of shredded cheddar, mozzarella, or even parmesan for melted cheesy pockets inside your hash brown waffles. It’s a guaranteed crowd-pleaser.
Are Crispy Hash Brown Waffles gluten-free?
The recipe as written uses all-purpose flour, but you can swap in your favorite gluten-free flour blend or even a spoonful of cornstarch for an easy gluten-free version.
Final Thoughts
If you’ve never experienced the pure bliss of Crispy Hash Brown Waffles, now’s the time to dive in. They’re the kind of meal that makes mornings better and brunch tables unforgettable. Give them a try soon — you’ll wonder how you ever did breakfast without them!
PrintCrispy Hash Brown Waffles Recipe

Crispy Hash Brown Waffles are a delightful twist on traditional hash browns, combining the crispy texture of a waffle with the savory goodness of shredded potatoes and onions. These waffles are easy to make and perfect for a hearty breakfast or brunch.
- Prep Time: 20 minutes
- Cook Time: 15 minutes
- Total Time: 35 minutes
- Yield: 4 waffles
- Category: Breakfast, Brunch
- Method: Baking, Frying
- Cuisine: American
- Diet: Vegetarian
Ingredients
Russet Potatoes (2 large)
Yellow Onion (1/4 medium)
All-Purpose Flour (2 tablespoons)
Egg (1 large)
Salt (1 teaspoon)
Black Pepper (1/2 teaspoon)
Garlic Powder (1/2 teaspoon)
Vegetable Oil (for cooking)
Optional Seasonings (to taste)
Instructions
- Prepare the Potatoes: Start by washing and peeling your russet potatoes. Once peeled, use a box grater or food processor with a grating attachment to shred the potatoes. Aim for medium shreds, not too fine and not too coarse. Coarse shreds will give a more rustic texture, while medium shreds will cook more evenly.
- Remove Excess Moisture: This is a critical step for achieving crispy waffles. Place the shredded potatoes in a clean kitchen towel or cheesecloth. Gather the edges of the towel and squeeze firmly to extract as much moisture as possible. You’ll be surprised how much water comes out! Removing excess moisture prevents soggy waffles and promotes crispiness. You can repeat this process with a fresh towel if the potatoes are still very wet.
- Grate the Onion: Peel and finely grate the yellow onion. You can use the same box grater or food processor you used for the potatoes. Finely grating the onion ensures it cooks through and distributes evenly in the waffle batter.
- Combine Ingredients: In a large mixing bowl, combine the squeezed shredded potatoes, grated onion, all-purpose flour, egg, salt, black pepper, and garlic powder. Mix everything together thoroughly with your hands or a spatula until all ingredients are well combined and the potatoes are evenly coated. Ensure there are no clumps of flour remaining.
- Preheat Waffle Iron: Preheat your waffle iron according to the manufacturer’s instructions. Most waffle irons have a light or temperature setting to indicate when they are ready. It’s crucial for the waffle iron to be hot before adding the potato mixture to ensure proper cooking and crisping. Lightly grease the waffle iron grids with vegetable oil using a brush or cooking spray. This prevents sticking and makes for easy waffle removal.
- Cook the Waffles: Once the waffle iron is hot and greased, scoop about 1/2 cup of the potato mixture onto the center of the preheated waffle iron grid. The amount will vary slightly depending on the size of your waffle iron. Spread the mixture evenly to almost reach the edges of the waffle grid, but avoid overfilling.
- Waffle Iron Magic: Close the waffle iron lid and cook according to your waffle iron’s instructions, or until the waffles are golden brown and crispy. This usually takes about 5-7 minutes, but cooking time can vary depending on your waffle iron and the desired level of crispness. Avoid opening the waffle iron too early, as this can cause the waffles to stick and tear.
- Achieve Peak Crispiness: Once the waffles are cooked through and golden brown, carefully remove them from the waffle iron using a fork or tongs. Place the cooked waffles on a wire rack to maintain their crispiness. Avoid stacking them directly on a plate, as this can trap steam and make them soggy.
- Repeat and Serve: Repeat steps 6-8 with the remaining potato mixture until all waffles are cooked. Serve immediately while they are hot and crispy with your favorite toppings and sides. These hash brown waffles are best enjoyed fresh for optimal texture.
Notes
- For extra flavor, consider adding cheese, bacon bits, or chopped herbs to the waffle batter.
- Make sure to season the potato mixture generously to enhance the overall taste of the waffles.
- Experiment with different seasoning blends to customize the flavor profile of your hash brown waffles.
Nutrition
- Serving Size: 1 waffle
- Calories: 220
- Sugar: 2g
- Sodium: 380mg
- Fat: 12g
- Saturated Fat: 2g
- Unsaturated Fat: 9g
- Trans Fat: 0g
- Carbohydrates: 25g
- Fiber: 2g
- Protein: 4g
- Cholesterol: 45mg
Keywords: hash brown waffles, crispy waffles, breakfast recipe, brunch idea, savory waffles


