Chocolate Peanut Butter Rice Krispie Cups Recipe
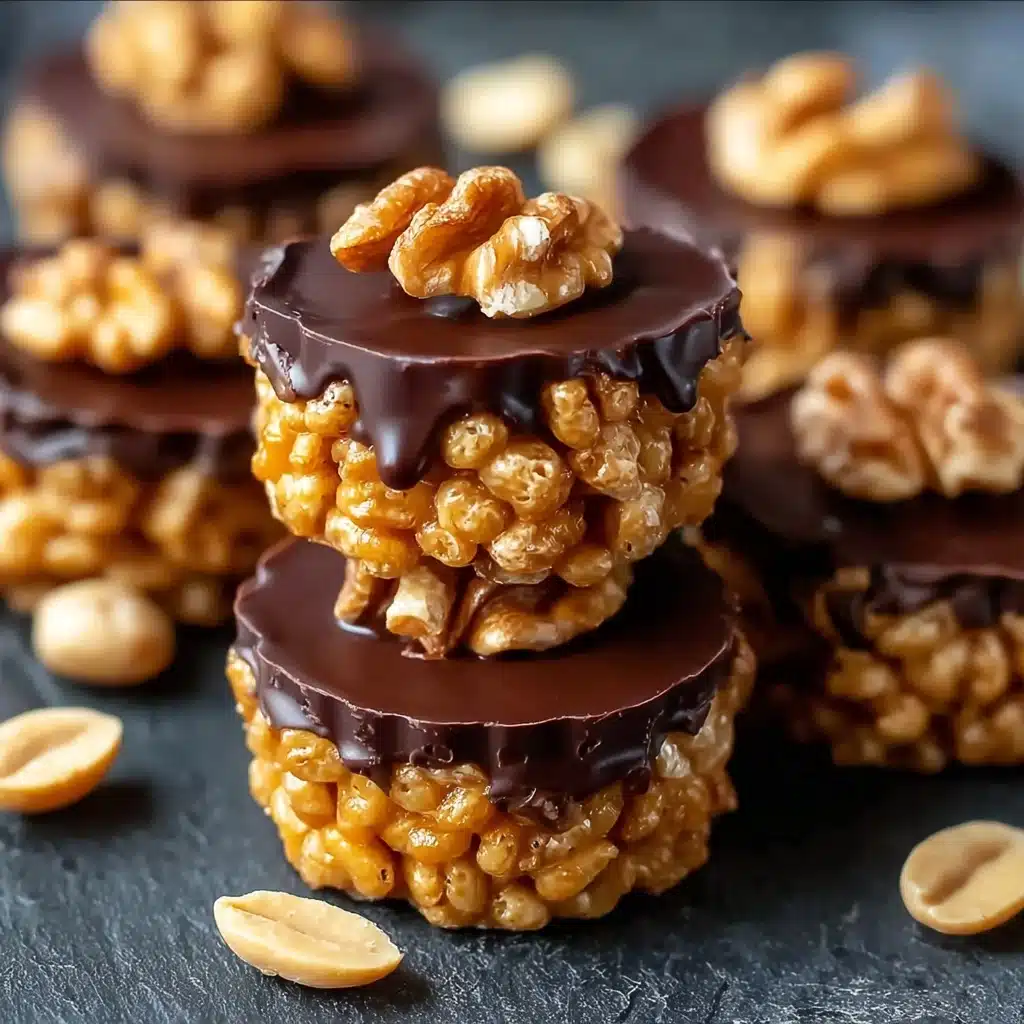
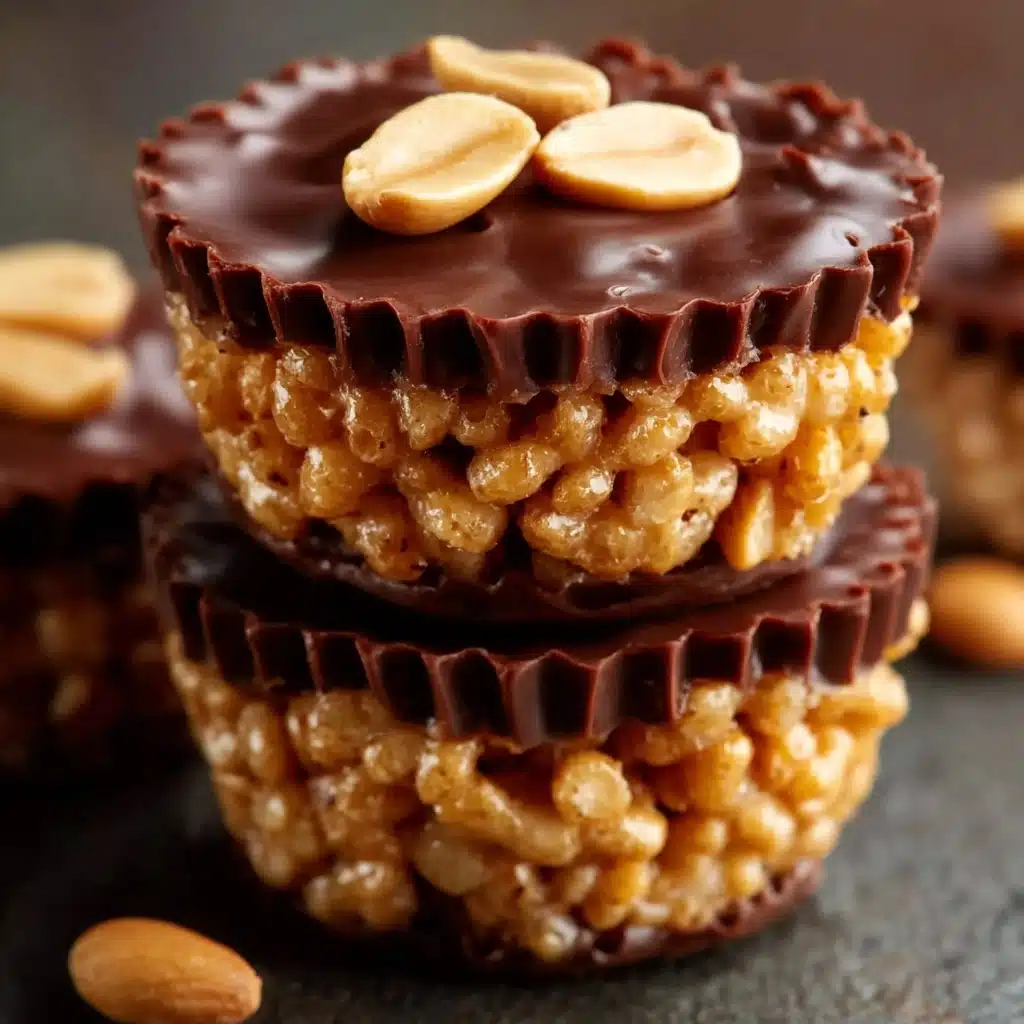
If you’re on the hunt for a sweet treat that’s as delightful to make as it is to eat, look no further than these Chocolate Peanut Butter Rice Krispie Cups. Imagine the crispy, airy crunch of rice cereal mingling with a creamy peanut butter base, all topped with a luscious layer of chocolate—this dessert radiates pure nostalgia with a gourmet twist. Best of all, you don’t need any fancy equipment or hard-to-find ingredients, just a few pantry staples and a love for classic flavor combos. Whether you’re whipping up a batch for a party, an afternoon snack, or a late-night craving, these cups are sure to hit the spot and become an instant favorite.
Ingredients You’ll Need
Pulling together Chocolate Peanut Butter Rice Krispie Cups means gathering just a handful of everyday ingredients, each bringing a special role to the table. Every scoop and sprinkle contributes to the unforgettable texture and flavor that transforms these into much more than your average crispy treat.
- Rice Krispies cereal: These bring the iconic crispiness and light texture to every bite, creating that satisfying crunch we all crave.
- Creamy peanut butter: Adds rich, nutty depth and helps bind everything together; go for creamy for the smoothest texture.
- Unsalted butter: Lends a subtle richness and ensures every element melts together beautifully.
- Mini marshmallows: Sweet, sticky, and melt-in-your-mouth, they’re essential for shaping and holding the cups together.
- Chocolate chips: Melt into a glossy, decadent topping that takes the treat from nostalgic to next-level indulgence.
- Vanilla extract (optional): Adds a hint of warmth and rounds out the flavor, especially if your peanut butter isn’t sweetened.
- Pinch of sea salt (optional): Sprinkling a little on top accentuates the sweet-salty balance and makes the chocolate pop.
How to Make Chocolate Peanut Butter Rice Krispie Cups
Step 1: Melt the Base
Start by grabbing a medium saucepan and set it over low heat. Add the unsalted butter and mini marshmallows, then let them gently melt together, stirring constantly for a glossy, velvety mixture. Keep the heat low and slow to prevent any burning—this step lays the foundation for those delicious, sticky cups.
Step 2: Add Peanut Butter
Once everything’s smooth and melted, stir in the creamy peanut butter. If you’re using vanilla extract, now’s the time to add it. Mix thoroughly until the peanut butter is completely incorporated, creating a dreamy, unified base that smells just as heavenly as it tastes.
Step 3: Mix with Cereal
Pour your Rice Krispies into a large mixing bowl, then drizzle the warm peanut butter-marshmallow mixture over the cereal. Gently fold everything together until every piece is evenly coated. The goal is to cover the cereal without crushing those airy puffs, so use a light hand.
Step 4: Shape the Cups
Line a muffin tin with paper liners—this will make serving and cleanup a breeze. Spoon the mixture into each well, dividing it as evenly as possible. Press the tops gently with the back of your spoon or clean fingers to create a flat surface, setting the stage for the gorgeous chocolate layer.
Step 5: Add Chocolate Layer
Pop your chocolate chips into a microwave-safe bowl and heat them in 20-second bursts, stirring after each, until they’re smoothly melted. Spoon a layer of melted chocolate over each cup and spread it to the edges, letting it ooze into all the nooks. If you love that sweet-salty magic, a sprinkle of sea salt on top is the ultimate finishing touch.
Step 6: Set & Serve
Let your Chocolate Peanut Butter Rice Krispie Cups sit at room temperature for about 20 minutes, or speed things up in the fridge. Once the chocolate is firm, simply peel away the paper liners and marvel at your handiwork. Each cup is ready to be devoured!
How to Serve Chocolate Peanut Butter Rice Krispie Cups
Garnishes
For an extra flourish, you can top your cups with a light dusting of flaky sea salt, a drizzle of melted white chocolate, or even a few mini peanut butter chips. Each option adds an extra layer of flavor or a pop of contrast, making every bite a little bit more special.
Side Dishes
Since Chocolate Peanut Butter Rice Krispie Cups are rich and satisfying, serve them alongside fresh fruit like strawberries or apple slices for a refreshing balance. For a more decadent spread, pair with a scoop of vanilla or coffee ice cream—the cool creaminess plays off the dense, nutty cup beautifully.
Creative Ways to Present
For parties, nestle each cup in colorful mini cupcake liners and arrange them on a pretty platter or tiered stand. Make them extra festive by topping with sprinkles, chopped peanuts, or even edible glitter. If you’re gifting, stack a few in clear treat bags and tie them with ribbon for a charming, homemade touch.
Make Ahead and Storage
Storing Leftovers
Keep any uneaten Chocolate Peanut Butter Rice Krispie Cups in an airtight container at room temperature for up to 3 days. If your kitchen is especially warm, you might prefer the fridge to keep the chocolate from getting too soft. Just make sure they’re fully cooled before sealing them up.
Freezing
These cups freeze surprisingly well! Place them in a single layer in a freezer-safe container, separated by parchment paper. They’ll stay happy and delicious for up to 2 months—simply thaw at room temperature for 15–20 minutes before enjoying.
Reheating
There’s no need to reheat these little treats, but if you want that gooey, just-made experience, let them rest at room temperature for several minutes. Don’t microwave, as it can melt the chocolate too much and alter the texture of the crispy base.
FAQs
Can I use chunky peanut butter instead of creamy?
Absolutely! Using chunky peanut butter will add extra texture and a delightful nutty crunch to your Chocolate Peanut Butter Rice Krispie Cups. Just make sure it’s well-mixed for easy incorporation.
Do I have to use mini marshmallows, or can I substitute regular ones?
You can swap in regular marshmallows if that’s what you have on hand. Just be sure to measure by weight (about 4 ounces) and cut them into smaller pieces for faster, even melting.
What’s the best way to melt chocolate chips for the topping?
Microwaving in short bursts is quick and convenient, but you can also melt chocolate chips in a double boiler on the stove if you prefer more control. Just go low and slow for smooth, glossy results.
Can I make these gluten-free?
Yes, just use a gluten-free crispy rice cereal (many mainstream brands now carry one), and double-check that your peanut butter and chocolate chips are labeled gluten-free.
What variations can I try with these cups?
The possibilities are endless! Mix in chopped pretzels, dried fruit, or swirl almond butter into the base. You can even use a mix of milk and dark chocolate chips on top for a more complex flavor.
Final Thoughts
There’s something irresistible about the combination of chocolate, peanut butter, and crispy rice, and these Chocolate Peanut Butter Rice Krispie Cups deliver all of that joy in every bite-sized treat. Whether you’re making them for someone special or simply treating yourself, you’re bringing a little happiness to the table—one cup at a time. Give this recipe a try, and discover for yourself why these are destined to be your new family favorite!
PrintChocolate Peanut Butter Rice Krispie Cups Recipe
Indulge in these delightful Chocolate Peanut Butter Rice Krispie Cups that offer a perfect blend of sweet, salty, and crunchy in every bite. Easy to make and a hit with both kids and adults!
- Prep Time: 10 minutes
- Cook Time: 10 minutes
- Total Time: 30 minutes
- Yield: 12 cups 1x
- Category: Dessert
- Method: Mixing, Melting
- Cuisine: American
- Diet: Vegetarian
Ingredients
Rice Krispies Mixture:
- 3 cups Rice Krispies cereal
- 1 cup creamy peanut butter
- 1/2 cup unsalted butter
- 1 cup mini marshmallows
Chocolate Layer:
- 1 cup chocolate chips
- 1/2 tsp vanilla extract (optional)
- Pinch of sea salt (optional)
Instructions
- Melt the Base: In a medium saucepan over low heat, melt butter and marshmallows while stirring consistently until smooth.
- Add Peanut Butter: Stir in peanut butter and vanilla extract (if using) until fully combined and creamy.
- Mix with Cereal: Pour the Rice Krispies into a large bowl and add the peanut butter mixture. Gently fold until all the cereal is coated evenly.
- Shape the Cups: Line a muffin tin with paper liners. Spoon the mixture evenly into each cup and press down gently to form a flat surface.
- Add Chocolate Layer: Melt chocolate chips in the microwave (20-second intervals, stirring in between). Spoon melted chocolate over each cup and spread evenly. Sprinkle with sea salt if desired.
- Set & Serve: Allow the cups to cool at room temperature for 20 minutes or place them in the refrigerator to set faster. Once firm, remove the paper liners and serve!
Nutrition
- Serving Size: 1 cup
- Calories: 280
- Sugar: 18g
- Sodium: 190mg
- Fat: 18g
- Saturated Fat: 8g
- Unsaturated Fat: 8g
- Trans Fat: 0g
- Carbohydrates: 25g
- Fiber: 1g
- Protein: 5g
- Cholesterol: 15mg
Keywords: Chocolate Peanut Butter Rice Krispie Cups, Dessert, Rice Krispies, Peanut Butter, Chocolate, Easy Recipe

